This article describes how to build an offline Standalone Root Certificate Authority (CA) with an Enterprise Subordinate CA. You can configure it over Server Manager or with PowerShell. The article describes the way with PowerShell in Windows Server 2019 Server Core.
Go to Part 2 for configuring the Enterprise Subordinate CA: Install an Offline Root CA with an Enterprise Subordinate CA – Part 2
Part 1 – Implement Standalone Root CA
- Basic setup
- Installation of Windows Server 2019
- IP / DNS Configuration
- Change Computer Name
- Enable Remote Desktop
- Enable Firewall Rules (RDP, Remote Management,…)
- Install Active Directory Certificate Authority Role Service:
Add-WindowsFeature Adcs-Cert-Authority
- Configure Active Directory Certificate Authority:
Install-AdcsCertificationAuthority -CAType StandaloneRootCa -CACommonName Company-RootCA -ValidityPeriodUnits 30
- CAType should be StandaloneRootCa
- CACommonName ist the name of your Root CA
- ValidityPeriodUnits is Default 5 (Years) you can configure it as you need it
- There are additional parameters which can be set, the ones mentioned above are the most important, you can first execute the command with -WhatIf switch to check what will be happening
- Now your Root CA is already up and running but needs some additional configuration
- Configure registry keys:
certutil -setreg CA\ValidityPeriod "Years" certutil -setreg CA\ValidityPeriodUnits 30 certutil -setreg CA\DSConfigDN "CN=Configuration,DC=intra,DC=domain,DC=ch" certutil -setreg CA\DSDomainDN "DC=intra,DC=domain,DC=ch"
- First is already default / just for confirmation
- ValidityPeriodUnits like value during installation
- The DSConfigDN and DSDomainDN are important parameters for adding an Enterprise Subordinate CA which is domain joined, so you need to replace the “DC=” valuews with your AD Domain values
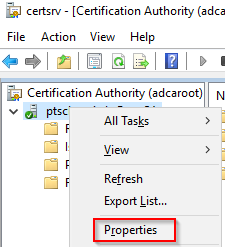
- Now you need to open the Certification Authority Administrative Tools Snap-in (certsrv.msc) and connect to your Root CA server
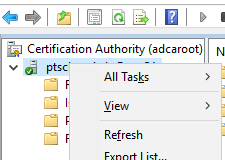
- Right click on CA and click properties
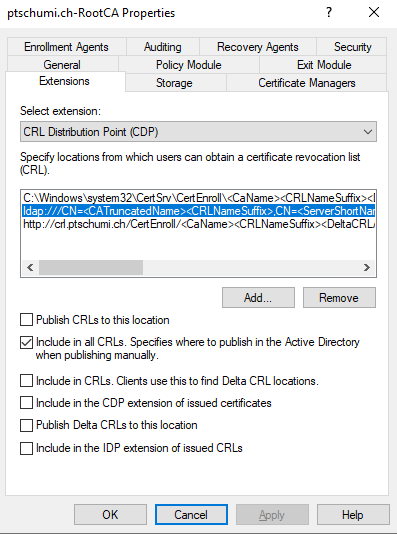
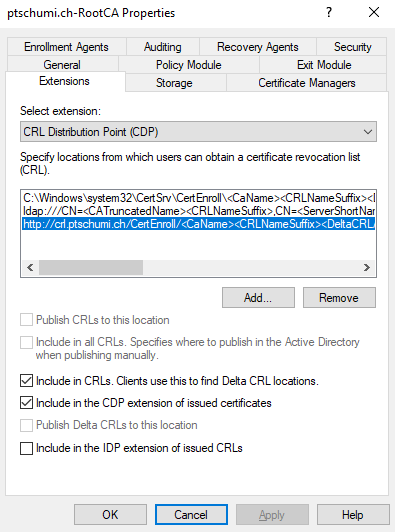
- Navigate to Extensions, here we need to modify both, the CRL Distribution Point (CDP) and the Authority Information Access (AIA) because the Root CA will not be available for accessing the CRL or Root Certificate, so we need to define where these items can be accessed.
- In CRL remove the entries for http and file and remove the checkbox Publish CRLs to this location for LDAP
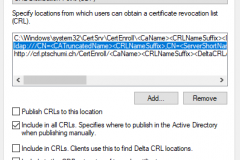
- Then add a new entry with your URL (can be the Enterprise Subordinate CA server or better you use an alias like crl.domain.com which is pointing to your Enterprise CA Server which we will configure afterwards)
Example URL: http://crl.domain.ch/CertEnroll/<CaName><CRLNameSuffix><DeltaCRLAllowed>.crl
Check Include in CRLs and Include in the CDP
- Apply
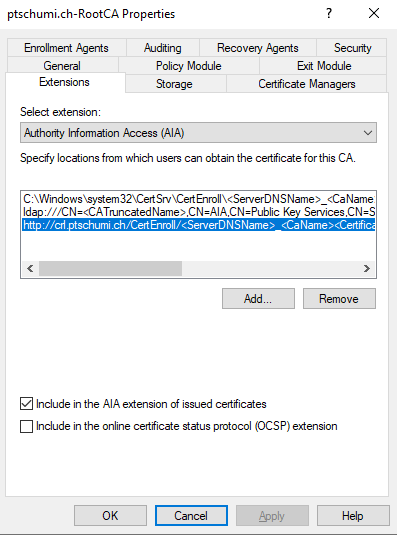
- In the extension drop down select Authority Information Access (AIA) and remove http and file entries
- Then add a new entry, again with your Alias URL, e .g. http://crl.domain.ch/CertEnroll/<ServerDNSName>_<CaName><CertificateName>.crt
Check Include in the AIA extension of issued certificates
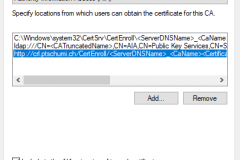
- Apply and exit properties
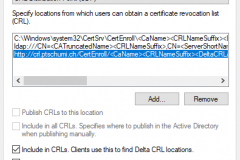
- In CRL remove the entries for http and file and remove the checkbox Publish CRLs to this location for LDAP
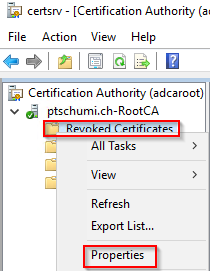
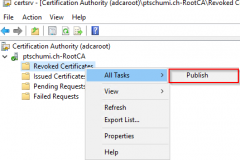
- Navigate to Revoked Certificates and select properties
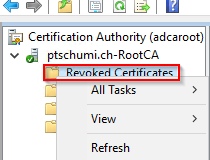
- Here in this area you can modify the CRL publication interval, it is per default 1 week. Keep in mind you will take offline the Root CA and the CRL should be alive, I don’t know best practices exactly but put here 30 years too so that after an export I can take Root CA offline and don’t have to refresh CRL periodically.
When the CRL is outdated, the Subordinate CA, which is checking the CRL gives an error and cannot be started. Alternatively you can avoid this service start issue with settingCertutil.exe -setreg ca\CRLFlags +CRLF_REVCHECK_IGNORE_OFFLINE
on the Subordinate CA server
- Now restart Root CA Server that settings are applied
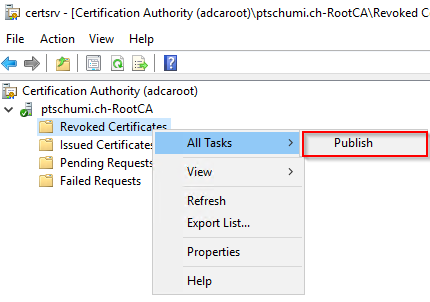
- Finally publish the CRL
- Now we’re done with the Root CA and can move over to the Enterprise Subordinate CA
- Go to Install an Offline Root CA with an Enterprise Subordinate CA – Part 2
- Right click on CA and click properties