If you start to use internal PKI certificates with Intune and Azure AD Joined devices only, it’s not enough to only publish your CRL to Active Directory. It’s maybe even better to completely remove LDAP Publishing and focus on the http Publishing for CRL and AIA Information.
In this little Install Guide I descript the simple setup of a CRL with IIS. I do not cover here the Publishing but you should publish it in http and through a Reverse Proxy. In my case I used an existing KEMP but you’re free to use any solution you have already in place or publish it through Azure App Proxy. If you publish it with Azure App Proxy you have to create a CNAME record of your CRL URL in the certificate which points to your msapproxy.net URL.
Installation
In my case I made a domain join of this web server, it makes it easier to assign the permissions and manage it. After I fully patched the machine I stated with the IIS setup through PowerShell (Remote Server Manager would be an option too):
Install-WindowsFeature "Web-Server"
As this is a Server Core machine I enabled Remote Management to connect to IIS with my IIS Management Console remotely.
Set-ItemProperty -Path "HKLM:\SOFTWARE\Microsoft\WebManagement\Server" -Name "EnableRemoteManagement" -Value 1
Set-Service -Name WMSVC -StartupType Automatic
Start-Service WMSVC
Configuration
- Create the CDP Directory
New-Item -Path "c:\" -Name "CDP" -ItemType "directory"
- Create the file share
New-SmbShare -Name "cdp$" -Path "C:\CDP" -FullAccess "DOMAIN\SERVERNAME$" -ReadAccess Everyone -CachingMode None
- Add the NTFS Permissions to the Share
$FolderPath = "C:\CDP"<br/>$UserAccount = "ORION\CRL$"<br/>$Acl = Get-Acl $FolderPath<br/>$Ar = New-Object system.Security.AccessControl.FileSystemAccessRule($UserAccount, "FullControl", "ContainerInherit, ObjectInherit", "None", "Allow")<br/>$Acl.Setaccessrule($Ar)<br/>Set-Acl $FolderPath $Acl
- Create a new Virtual Directory
New-WebVirtualDirectory -Site "Default Web Site" -Name "cdp" -PhysicalPath "c:\cdp"
- Enable Directory Browsing
C:\Windows\System32\inetsrv\appcmd.exe set config "Default Web Site/cdp" /section:directoryBrowse /enabled:true
- Allow double escaping
C:\Windows\System32\inetsrv\appcmd.exe set config "Default Web Site/cdp" /section:requestfiltering /allowdoubleescaping:true
- Internal DNS: Create CRL Entry
Add a new DNS Entry / Zone for your CRL URL access internally, pointing to your CRL webserver or reverse proxy. It should match the URL you have in the CRL distribution Point on your CA’s extension tab.
For example http://crl.domain.ch/cdp/ - External DNS: Create CRL Entry
Add a new CNAME or A Record to your public DNS.
- Modify your CAs CDP to automatically copy new CRLs to the webserver directory
Example: \\crlserver\cdp$\<CaName><CRLNameSuffix><DeltaCRLAllowed>.crl
Verify also the http Publishing point, it should lead to your cdp, Example: http://crl.domain.ch/cdp/<CaName><CRLNameSuffix><DeltaCRLAllowed>.crl
Select Publish CRLs to this location and do that also with the Delta CRLs.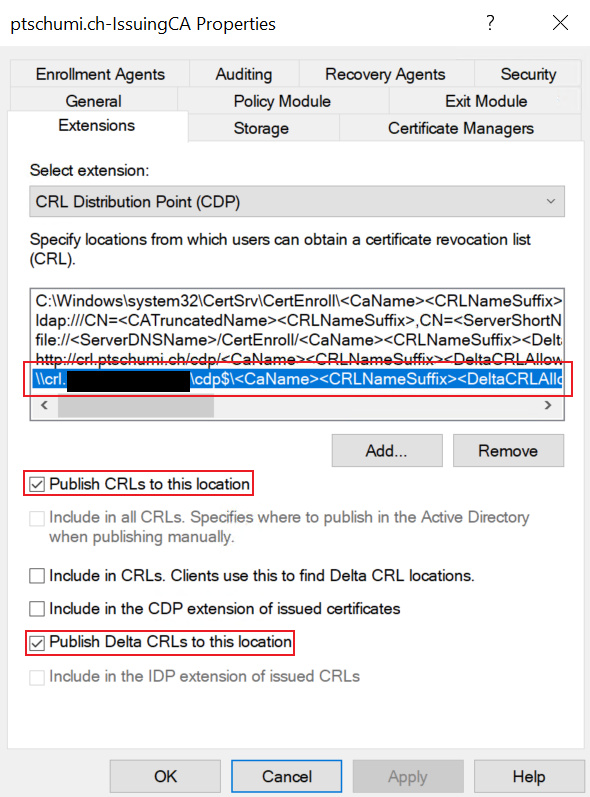
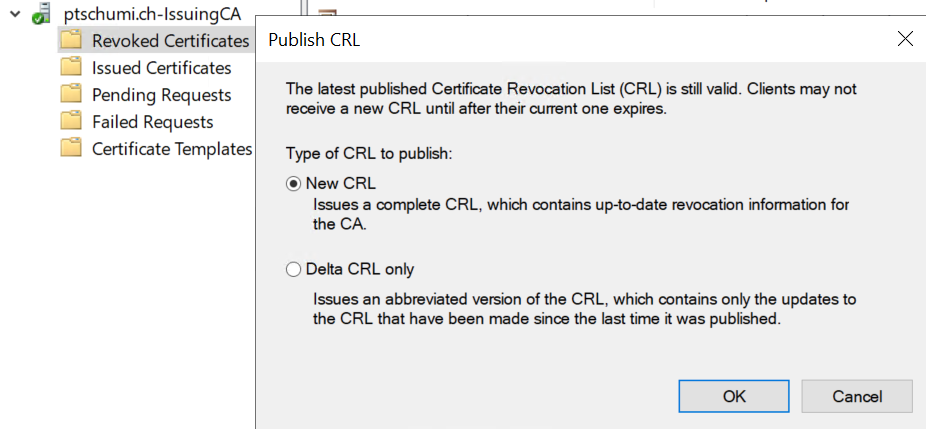
- Publish a new CRL
When you have done the configuration, you need to force a re-publishing of the CRL by doing a right-click on Revoked Certificates, hover over All Tasks and click Publish. Click New CRL and OK. You should now see the CRL and Delta CRL of the Issuing CA.
- Add CRLs from Root CA to your CDP location
If you have an Offline Root CA, do not forget to copy the CRL files from that CA to the CDP folder.
- Add also the certificates of your Root and Enterprise CA to that location
Make sure you configure and publish the http location for the Authority Information Access (AIA) and copy these certificate files also to the CDP folder.
- Test the URL
Check if the URL is accessible externally and internally. Also verify that you can download each file through the browser.
You should now have at least two CRL files (CRL and Delta) visible there.
If you have a Root CA you should have another two CRLs for the Root.
For each CA there should also be published a crt file. - Re-Issue Certificates
If necessary renew certificates, that they have propagated the correct information regarding CDP / AIA in your certs.
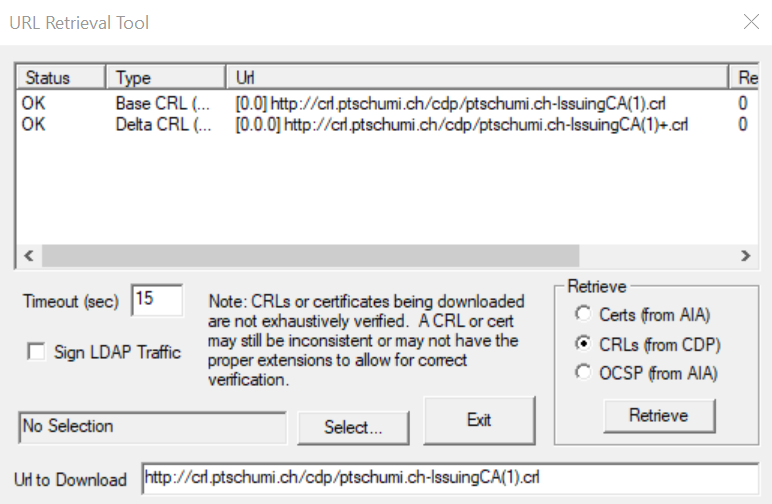
CRL Checks with Certutil
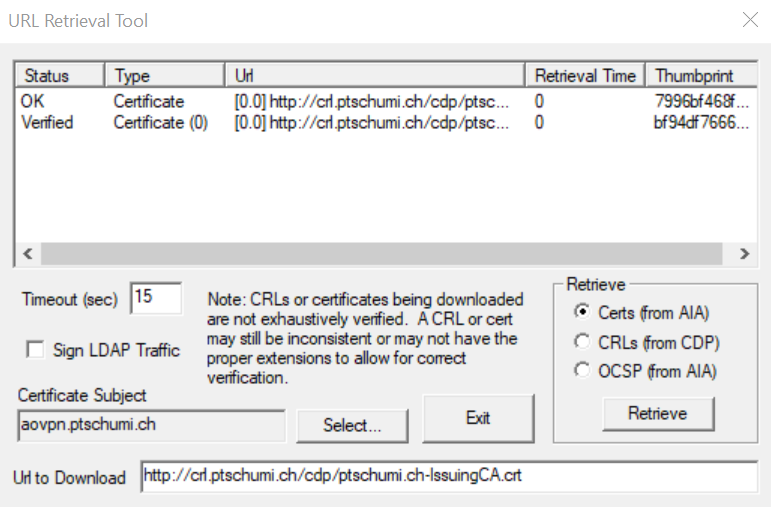
After doing configurations on CRL publishings, I suggest you to test it afterwards with certutil. Check it internally and externally. If you have ldap publishing activated you may have additional ldap urls which do fail from external / a not doman joined client. But HTTP distribution points should be displayed with status OK.
Just open a command prompt and Query your CA the following way, then click on Retrieve:
Certutil -url http://crl.domain.ch/cdp/yourcrl.crl
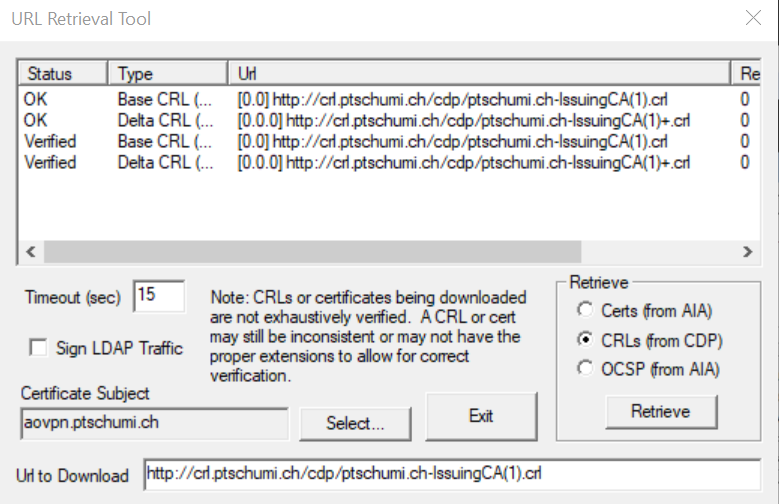
And the same with a certificate selected:
Or for a certificate (AIA) query:
http://crl.domain.ch/cdp/yourissuingcacert.crt
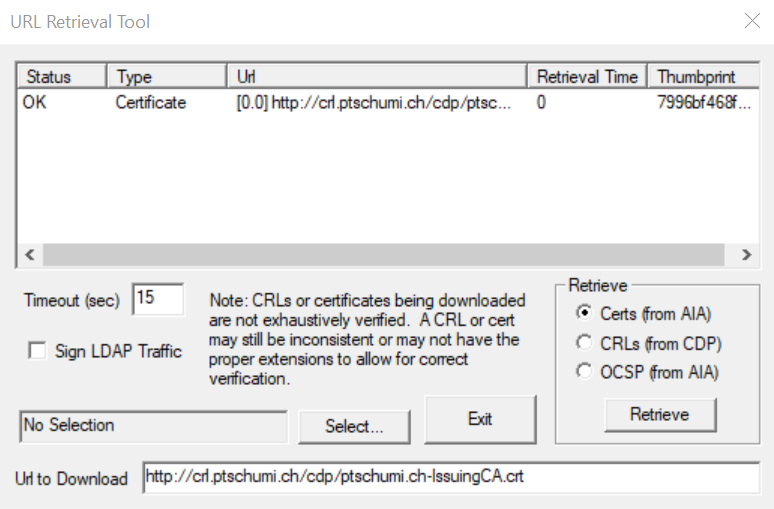
And the same with certificate selected:
Certutil -verify to verify Revocation
Another useful command is certutil -verify:
certutil -verify -urlfetch C:\temp\cert.cer
At the end you should get something like:
Verified Issuance Policies: None
Verified Application Policies:
    1.3.6.1.5.5.7.3.1 Server Authentication
    1.3.6.1.5.5.8.2.2 IP security IKE intermediate
    1.3.6.1.5.5.7.3.2 Client Authentication
Leaf certificate revocation check passed
CertUtil: -verify command completed successfully.
The report shows you what is going wrong if you have Revocation Check Failures.
The following checks are done:
- Certificate AIA
- Certificate CDP
- Base CRL CDP
- Certificate OCSP
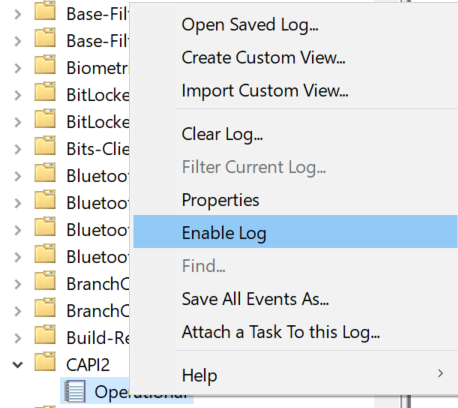
Enable CAPI2 Logging
If you deal with certificates and revocation and have issues around that, then CAPI2 Logging is your friend. This log is disabled by default. Just open the Event Viewer then navigate to Applications and Services Logs, Microsoft, Windows and search for CAPI2.